
Postman Environments
Some features of Postman which we still do not use. Not advanced features but are basic features that we’ve overlooked.


REST APIs have become part and parcel of backend development. While we work in varied technologies for new developments and work on older technologies for support perspectives, when it comes to testing APIs we stick to a few tools. Postman is one of the most versatile tools available for testing APIs.
Postman makes life easier, is simple and intuitive, Great!.
There are certain features of Postman which we still do not use. I wouldn’t call them advanced features but are basic features that we’ve overlooked.
Environment Variables:
One common problem we face is to manage Dev, Staging and Production environment endpoints. Previously even I used to duplicate endpoints and put them into separate collections one each for Dev, Staging and production.
Environments are something similar to configuration files that we use in development. We usually have one set of config files for each. We store Database info, Service account info and such info that are required to separate Dev and Prod systems.
In Postman we configure each environment to replace variables and values pertinent to that particular stage of Software Life cycle environment.
So, where do we find this Environment, how to configure and how to use it?
Here is the answer
On the right side of the Postman application to the right of the Postman tabs which we use to test the APIs you can see a dropdown with the text “No Environment”
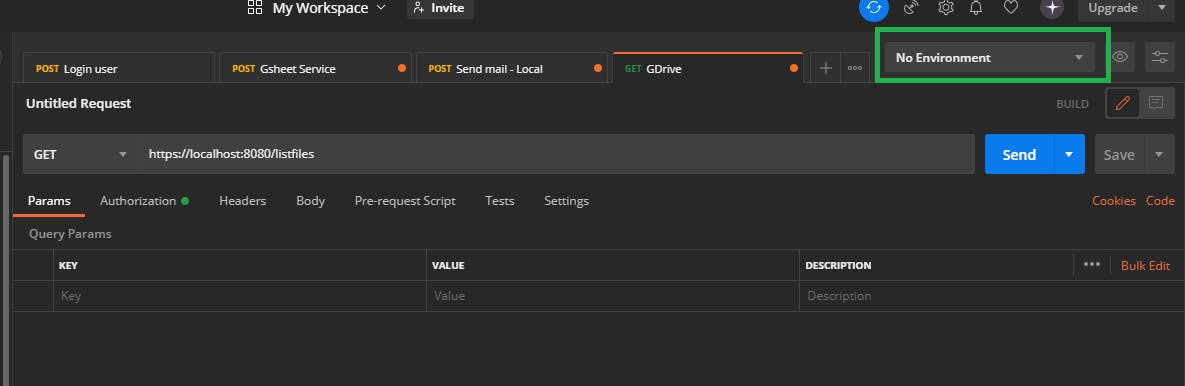
This is where all the existing environments configured by you will be listed.
I’m currently using Postman v8.0.2. If your version differs, just follow the concept, The controls could be elsewhere.
Let’s get on with creating an environment and let’s configure something easy. Basically the local dev environment will be similar to localhost:port and the staging/Production will be different. So testing Local and Production APIs require us to change the endpoint URL. Now let’s see how to handle this smartly.
To create a new Environment follow the steps outlined below:
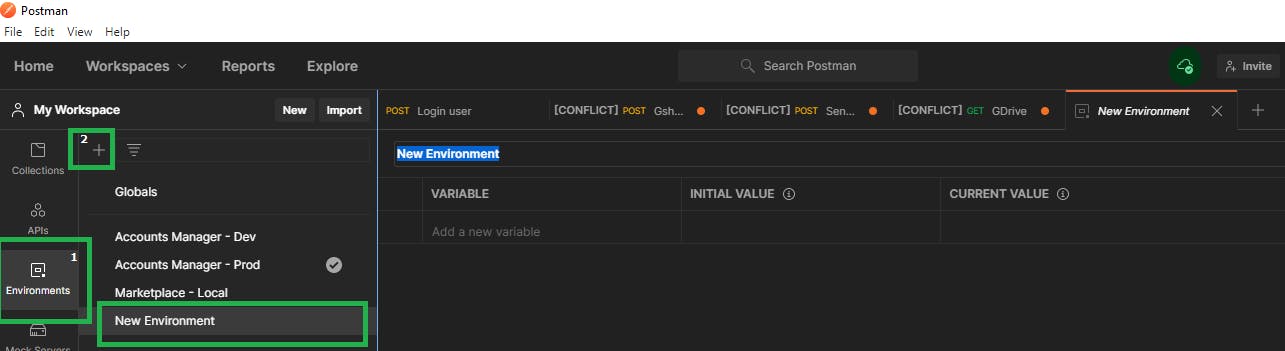
Click on the Environments item on the left Vertical toolbar*
The current environments defined will get listed in the next vertical placeholder.
You can see a + icon on the top left of this placeholder
Clicking on the + icon will open up a tab named as New Environment
- For older versions, you could see a Gear icon second next to the environment dropdown, which you can use to manage environments. A popup to Manage environments would show up where you can use the Add button at the bottom right to create a new environment.
Creating the Environment:
Type a name for the environment. I’ve entered TestApplication - Dev
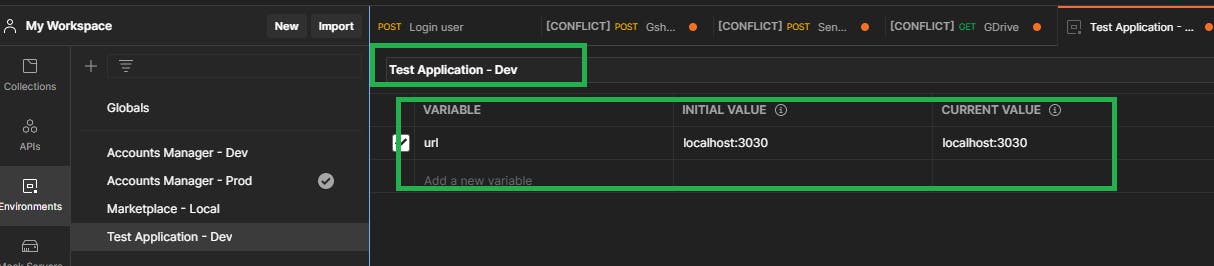
You can add the variables you want below. Since we discussed API url, I added a variable name url. You can specify the URL in the initial value which will automatically be copied over to the current value. In the case of URLs we will not see this value changing, but there are cases for other variables where the current value will be different from the one defined.
The simple case where Current value might change is in the instance of authentication tokens.
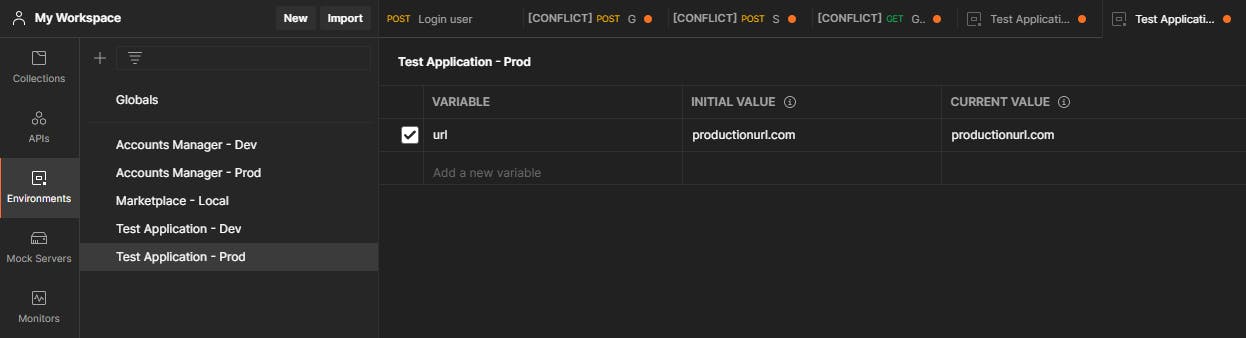
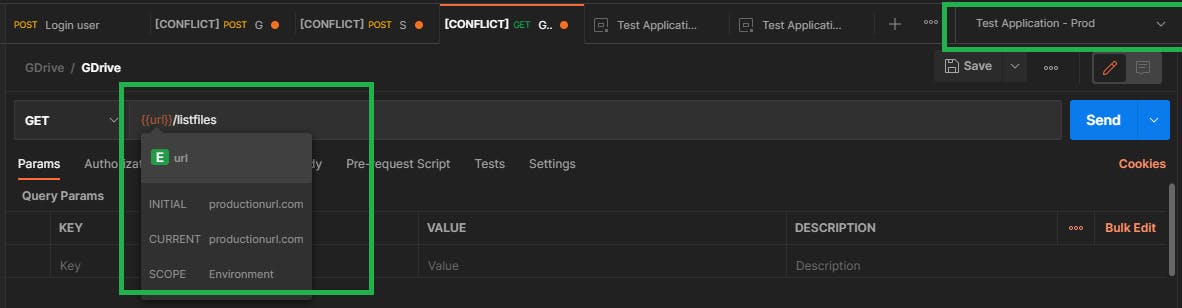
Similarly, create an environment for Prod environment with production URL
Environments in Action:
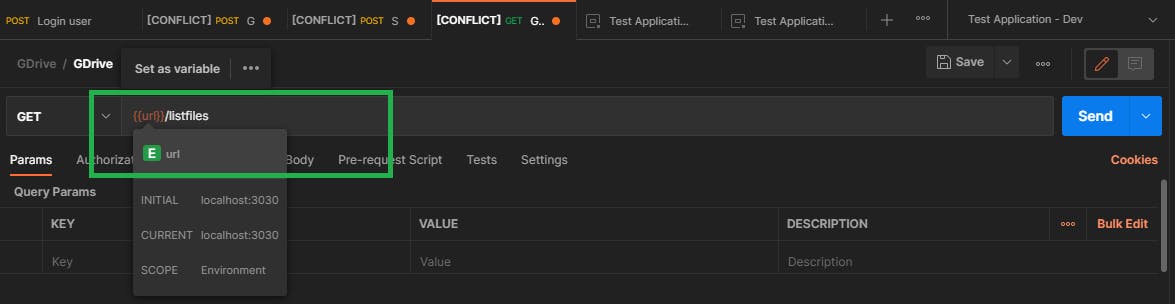
Assuming we have an endpoint /listfiles
To use environment variables, we need to enclose them within two sets of curly braces {{variable}}
Go to the API requests, create a new request, type {{url}}/listfiles. Here url is the variable we defined in the environment.
Now select Test Application - Dev from the environment dropdown, now hover over {{url}}, you could see localhost:3030
Similarly, if you want to change the url to production, you can simply select Test Application - Prod from the environment dropdown, it will automatically request the production API!!
You can replace the hardcoded URLs from the requests and replace with the variable.
This is going to make life easier. You will never need to worry manually changing URLs.
This is a basic use case of environments, You can expand it to fit other variables as needed.